AI photo enhancement terms every homeowner should know
AI photo enhancement terms every homeowner should know

TL;DR:
- Understanding AI photo enhancement terms helps you make intentional edits that accurately represent your space.
- Blending traditional techniques with AI tools ensures natural, compelling apartment images without over-processing.
You open a photo editing app to brighten your living room shot, and suddenly you’re staring at words like “super-resolution,” “GAN,” and “diffusion model.” Most people click past them and hope for the best. But here’s the thing: those terms are the key to getting your apartment photos to look exactly the way you want. Once you understand what each one actually does, you stop guessing and start making real decisions about how your space is presented, whether you’re listing a rental, planning a renovation, or just showing off a freshly decorated room.
Table of Contents
- Why photo enhancement terminology matters for property visuals
- Core terminology: Traditional enhancements vs. AI-powered tools
- Super-resolution, GANs, and diffusion: The new language of AI photo enhancement
- Pitfalls and limitations: What industry terms don’t tell you
- From jargon to action: Applying the right tools for your apartment photos
- Why blending tradition with AI beats pure buzzwords
- Bring your interiors to life with smart photo enhancement
- Frequently asked questions
Key Takeaways
| Point | Details |
|---|---|
| Master terminology | Understanding enhancement terms helps you use photo tools with real confidence. |
| Balance AI and basics | Mix traditional edits like contrast with AI-driven tricks for the best apartment photos. |
| Metrics are just a guide | Use technical scores to compare results, but trust your eye for what looks right. |
| Beware of overdoing it | AI enhancements can add unreal details if pushed too far—check results closely. |
Why photo enhancement terminology matters for property visuals
When you open any modern photo editing app or AI-powered platform, you’re immediately confronted with settings and labels that feel like they belong in a computer science textbook. Terms like “histogram equalization” or “noise reduction” aren’t obvious to most people, and that confusion leads to poor editing choices, or worse, avoiding the tools altogether.
Here’s the real cost of that confusion: you end up with apartment photos that don’t represent the space well. Blurry corners, washed-out walls, and dark corners all stay in the final image because the user didn’t know which setting to touch. Understanding the language behind photo enhancement puts you back in control.
Both basic and AI-driven tools share a foundational set of terminology. Whether you’re adjusting a brightness slider or letting an algorithm reconstruct detail in a blurry shot, the same core concepts apply. Key traditional techniques include contrast adjustment, histogram equalization, noise reduction, unsharp masking, and spatial filtering like Gaussian smoothing. These aren’t just for professionals. They’re the building blocks every editing app uses, and knowing them directly improves your results.
Here’s a quick breakdown of why this matters for property and interior photos specifically:
- Contrast adjustment determines how your room’s light and dark areas separate, which affects perceived depth and dimension.
- Noise reduction removes grain from low-light shots, especially important for interior photos taken without professional lighting.
- Histogram equalization redistributes brightness levels across the image, pulling detail out of shadows or overly bright areas.
- Unsharp masking sharpens edges so furniture and architectural details appear crisp rather than soft.
- Spatial filtering smooths or sharpens areas selectively, which is especially useful for texture-heavy surfaces like wood floors or fabric.
“Knowing what a setting actually does is the difference between editing with intention and editing by accident. For property photos, that difference shows up immediately.”
The editing steps for real estate that professionals rely on are built on these same fundamentals. Once you understand them, you’ll also understand why AI transforms visualization so dramatically. It doesn’t reinvent the process; it just does it faster and with much more precision.
Core terminology: Traditional enhancements vs. AI-powered tools
Now that you understand why the vocabulary matters, let’s actually define it. Photo enhancement tools generally fall into two camps: traditional methods and AI-driven methods. The good news is they’re not opposites. AI builds directly on traditional techniques, which means once you understand the classic terms, the AI ones become much easier to grasp.
Traditional terms you’ll encounter
- Contrast adjustment: Changes the range between the darkest and lightest pixels. Higher contrast makes a room look more dramatic and defined.
- Histogram equalization: Spreads pixel intensity values more evenly, revealing detail in both shadows and highlights.
- Noise reduction: Removes random pixel variation, usually caused by low light. Essential for any interior photo taken without a flash.
- Unsharp masking: A counterintuitive name for a sharpening technique that increases edge contrast to make details pop.
- Gaussian smoothing: Blurs the image slightly to reduce noise, often used as a step before sharpening.
AI-specific terms to know
- CNN (Convolutional Neural Network): A type of AI model trained to recognize patterns in images. Models like SRCNN and DnCNN use CNNs for tasks like super-resolution and denoising. AI methodologies feature CNNs for super-resolution and denoising, GANs for perceptual quality, and diffusion models for step-by-step noise removal.
- GAN (Generative Adversarial Network): Two AI models competing against each other, one generating images and one judging them. The result is often hyper-realistic detail that pure sharpening can’t achieve.
- Diffusion model: An AI approach that gradually adds and then removes noise from an image, learning to reconstruct it with remarkable accuracy. These are especially good at preserving fine detail.
- Super-resolution: The process of creating a high-resolution image from a low-resolution one, often using scale factors like x2 or x4.
Here’s a side-by-side comparison to make this concrete:
| Feature | Traditional methods | AI-powered methods |
|---|---|---|
| Speed | Requires manual adjustment | Automated, often under 30 seconds |
| Detail recovery | Limited by original pixel data | Can reconstruct or infer detail |
| Realism | Faithful but sometimes flat | Highly realistic, occasionally over-rendered |
| User knowledge required | Medium (slider-based) | Low to none (description-driven) |
| Best use case | Fine-tuning exposure and color | Upscaling, denoising, scene generation |
Key traditional techniques like contrast and noise reduction remain useful even within AI-powered workflows, because AI often uses them as preprocessing steps before the deeper model kicks in. The AI solutions for interiors you’ll find today typically combine both approaches behind the scenes.
Pro Tip: When trying a new photo editing tool, look for a “before/after” slider feature. It lets you see exactly what the AI changed, which is one of the fastest ways to learn what each setting actually does for your specific space.
The DIY editing guide approach works best when you understand both traditional and AI layers. You don’t need to master either fully. You just need to know what to reach for.
Super-resolution, GANs, and diffusion: The new language of AI photo enhancement
These three terms are the most talked-about in AI photo enhancement right now, and they’re also the most misunderstood. Here’s what they actually mean for your apartment photos.
Super-resolution is exactly what it sounds like: your photo gets sharper and more detailed. Super-resolution recovers high-resolution images from low-resolution inputs using upsampling with scale factors like x4. In plain terms, that blurry kitchen shot you took in bad lighting can be reconstructed so that the cabinet hardware, countertop texture, and backsplash tile are all clearly visible. ESRGAN (Enhanced Super-Resolution Generative Adversarial Network) is one of the leading models here, and it uses something called RRDB blocks (Residual-in-Residual Dense Blocks) to produce textures that look genuinely real rather than artificially sharpened.
GANs work differently. They generate realistic detail by essentially “imagining” what should be in the image based on patterns learned from millions of other photos. This is incredibly powerful for interiors, because wood grain, fabric weave, and plaster texture all get filled in convincingly. The risk is what researchers call “hallucinated textures,” where the AI adds detail that wasn’t actually there. A brick wall might come out looking slightly different from the real one. More on that in the next section.

Diffusion models are the newer approach and work almost like a careful reconstruction process, starting from noise and progressively clarifying the image. They’re excellent at preserving sharp edges and subtle details, which makes them ideal for architectural features like window trim, crown molding, and door frames.
| AI model type | Strength | Weakness | Best apartment use |
|---|---|---|---|
| CNN (SRCNN, DnCNN) | Accuracy, clean output | Less perceptual realism | Noise removal, general sharpening |
| GAN (ESRGAN, SRGAN) | Realistic textures | Potential hallucinations | Furniture detail, fabric, flooring |
| Diffusion model (DDPM) | Edge preservation | Slower processing | Architectural features, fine lines |
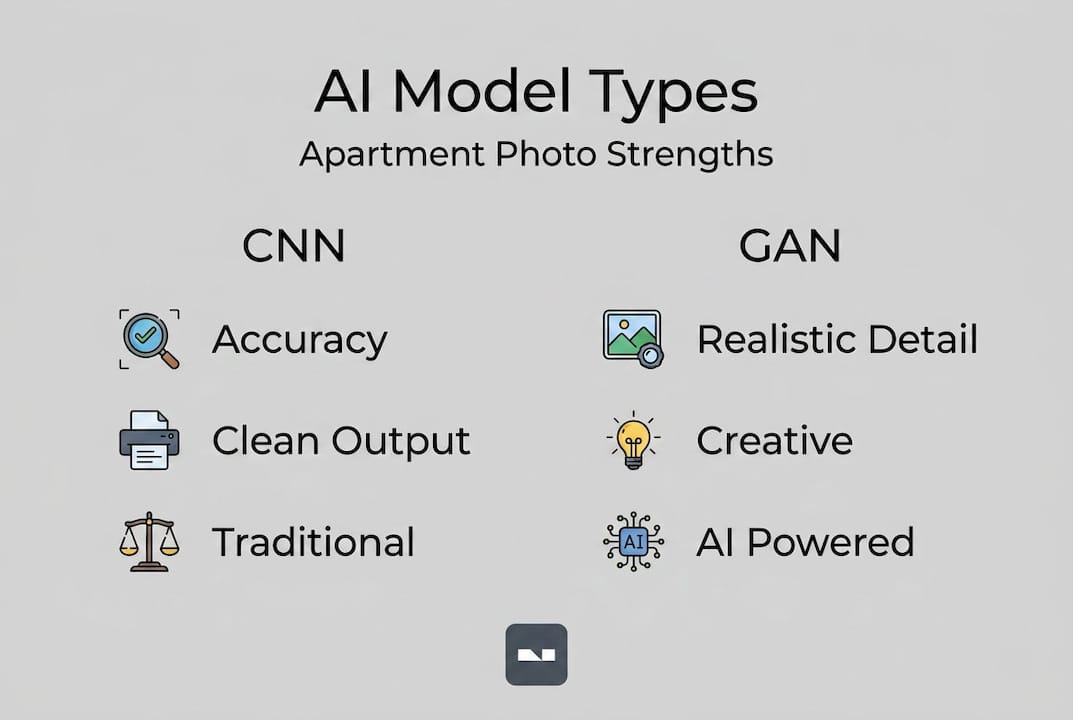
Performance metrics help you judge which tool is actually working. Metrics include PSNR, SSIM, and LPIPS, with real estate models hitting around PSNR ~28dB and SSIM ~0.89 on benchmark tests. PSNR (Peak Signal-to-Noise Ratio) measures pixel-level accuracy, SSIM (Structural Similarity Index Measure) captures how naturally the image is structured, and LPIPS (Learned Perceptual Image Patch Similarity) reflects how humans actually perceive the result. For your apartment photos, SSIM and LPIPS matter most because they reflect whether the image looks real to a human viewer.
Pro Tip: If an AI tool offers a “perceptual quality” mode vs. a “high fidelity” mode, choose perceptual for listing photos and high fidelity for renovation planning documents. They literally use different models under the hood.
Streamlining your AI photo workflow becomes much easier once you know which model type suits each task. You’re no longer guessing. You’re matching tools to outcomes.
Pitfalls and limitations: What industry terms don’t tell you
Even with a solid vocabulary, there are traps that catch most DIY editors off guard. The biggest one is assuming that advanced terminology equals better results for every situation.
Over-sharpening and hallucinated textures in GANs are the most common failure modes, along with computational cost, mode collapse during training, and poor generalization to real-world noise. In practical terms, this means:
- A GAN might make your hardwood floor look like it has a pattern it doesn’t actually have.
- Over-sharpening can make smooth painted walls look artificially textured.
- Some tools perform well on studio photos but struggle with the uneven lighting typical of actual apartment interiors.
- The AI may add fine details that look great on screen but look wrong to anyone who knows the actual space.
“A technically impressive score on a benchmark doesn’t mean the output looks right to the person who lives in that apartment. Trust your eyes.”
Technical terms also create a false sense of certainty. When a tool says it uses “diffusion-based super-resolution,” that tells you something about the method but nothing about whether it was trained on data that resembles your home. A model trained mostly on outdoor landscapes will struggle with the enclosed, mixed-light conditions of a typical apartment interior.
The best way to guard against this is to always compare the AI-enhanced version side by side with the original, and to check any areas that contain real patterns or textures you can verify. Your kitchen backsplash shouldn’t suddenly sprout grout lines that don’t exist. Understanding automated photo editing for interiors means knowing where to look for these subtle errors.
From jargon to action: Applying the right tools for your apartment photos
Now the vocabulary is useful. Here’s how to actually put it to work.
- Identify your core problem first. Is the image blurry, dark, grainy, or flat? Each issue maps to a specific tool. Grain calls for noise reduction. Blur calls for super-resolution. Flat walls call for contrast adjustment or exposure correction.
- Start with traditional edits. Before applying any AI model, correct your exposure, white balance, and basic contrast. This gives the AI cleaner input and produces better output. CNNs excel in classification and accuracy (92.4%), GANs in generation (FID 12.5), while diffusion edge-preserving variants retain structures best, making each model type suited to a specific problem.
- Apply AI upscaling or enhancement as a second step. Once the basics are clean, let the AI model handle the heavy lifting. Use GAN-based tools for texture-rich areas and CNN-based tools for detail clarity.
- Check your results against the real space. Walk the image through a mental checklist: does the floor look right? Are the walls the actual color? Are the edges of furniture clean without looking artificially crisp?
- Use metrics as a guide, not a final judge. PSNR and SSIM scores help you compare tools objectively, but always make your final call based on how the image looks to a real viewer.
The goal of user-friendly photo editing is to give you confident control without needing a software engineering background. The more you know about AI solutions for stunning interiors, the more intentional and effective your editing becomes.
Pro Tip: For rental listings, prioritize SSIM-optimized tools. Prospective renters form opinions within seconds of seeing a photo, and structural accuracy (does it look like a real room?) matters more than pixel-perfect sharpness.
Why blending tradition with AI beats pure buzzwords
Here’s an honest take that most AI tool marketers won’t tell you: the best apartment photos almost never come from a single cutting-edge model. They come from a thoughtful blend of old-fashioned editing judgment and targeted AI enhancement.
Research on hybrid CNN-GAN approaches supports this: pure pixel-based metrics like MSE and PSNR favor CNN outputs, while perceptual quality favors GAN and diffusion outputs. For property visualization, the sweet spot is a hybrid that scores well on both. In practice, that means doing your exposure and contrast work manually, then applying AI for specific tasks like texture recovery or noise removal.
What we’ve seen consistently is that chasing the latest model name rarely produces better results for everyday apartment photos. Someone who understands basic contrast and light adjustment will outperform someone who blindly applies a “state-of-the-art diffusion model” to a poorly lit, unadjusted shot. The technology amplifies what you give it.
There’s also a taste element that no metric captures. Your apartment has a specific character, a particular quality of light in the afternoon, a floor with a specific grain. The right photo tells that story honestly. Over-enhanced AI outputs sometimes look so polished that the space loses its personality, and prospective buyers or renters feel let down when they visit in person. The hybrid photo workflows that blend both approaches tend to preserve that authenticity while still delivering professional-quality results.
Focus on what the image is communicating, not which algorithm processed it.
Bring your interiors to life with smart photo enhancement
You now have something most homeowners and renters never get: a real working vocabulary for the tools you’re using. You know the difference between a CNN and a GAN, why diffusion models preserve edges so well, and where hallucinated textures can sneak in and mislead a viewer.

The next step is putting that knowledge to work. VibeMyFlat gives you AI-driven photo enhancement built specifically for apartment and interior spaces. Describe what you want in plain language, and the platform handles the model selection, processing, and output in under 30 seconds. You don’t have to choose between super-resolution and diffusion. The right tools are already applied based on your specific space and goal. For a deeper look at what’s possible, explore the AI photo enhancement guide and see how the technology you just learned about translates into real results for real rooms.
Frequently asked questions
What does ‘super-resolution’ really do to my apartment photos?
Super-resolution recovers high-resolution images from low-resolution inputs using upsampling with scale factors like x4, making interiors appear sharper with more visible detail in textures, edges, and surfaces.
How do I know if an AI photo enhancement tool is using GAN or CNN?
Most tools mention their method in the settings or documentation. AI methodologies feature CNNs for super-resolution and denoising and GANs for perceptual quality. GANs often promise “realistic detail” while CNNs typically advertise “clean” or “accurate” results.
Are high metric scores (PSNR, SSIM) all that matters for photo quality?
No. While PSNR, SSIM, and LPIPS metrics measure technical accuracy, your personal perception of how natural and honest the space looks matters just as much, especially for property photos where viewers know the real space.
What is a common pitfall with using advanced AI photo enhancement?
Hallucinated textures in GANs are a frequent issue, where AI adds detail that wasn’t in the original photo, making interiors look subtly wrong to anyone familiar with the actual space. Always compare the enhanced version to your original before publishing.