How to Update Lighting in Photos: A Practical Guide
How to Update Lighting in Photos: A Practical Guide
TL;DR:
- Learning how to improve lighting in photos significantly enhances mood, clarity, and viewer engagement.
- Mastering manual editing and utilizing AI relighting tools allow precise control over light, shadow, and color balance.
Flat light. Harsh shadows. That orange glow from a ceiling lamp contaminating what should have been a clean interior shot. If you’ve ever looked at a photo you were proud of and felt something was off, lighting was probably the culprit. Learning how to update lighting in photos is one of the highest-return skills a photographer or hobbyist can develop. It affects mood, clarity, composition, and even how viewers emotionally respond to an image. This guide walks you through the tools, techniques, and photo lighting tips you need to fix problem light in post, and how to avoid creating it in the first place.
Table of Contents
- Key takeaways
- How to update lighting in photos: tools and prerequisites
- Manual editing techniques for adjusting photo lighting
- Using AI tools to enhance lighting in images
- Practical tips to improve photo lighting during shooting
- Troubleshooting common photo lighting problems
- My honest take on AI versus traditional lighting edits
- Take your lighting further with Vibemyflat
- FAQ
Key takeaways
| Point | Details |
|---|---|
| Good lighting drives results | Professional lighting quality reduces return rates and increases engagement significantly compared to poorly lit photos. |
| Manual editing is foundational | Mastering exposure, highlights, shadows, and curves gives you precise control that no preset or AI tool can replicate for every shot. |
| AI relighting adds speed and creativity | Modern AI tools can simulate light direction and geometry, producing cinematic effects without reshoots in a fraction of the time. |
| Source quality still matters | Even the best AI cannot fully recover motion blur or severe underexposure. Good captures make great edits possible. |
| Shoot smarter to edit less | Color temperature consistency and modifier distance choices at capture time directly reduce post-processing complexity. |
How to update lighting in photos: tools and prerequisites
Before you touch a single slider, you need the right setup. Choosing the correct software and understanding a handful of lighting concepts will save you hours of frustration later.
Software options worth knowing
The most widely used tools for adjusting photo lighting fall into three categories: dedicated photo editors, layer-based compositing apps, and AI-powered relighting tools. Here is a quick comparison:
| Tool | Best for | Key lighting features |
|---|---|---|
| Adobe Lightroom | Batch adjustments, raw files | Exposure, tone curve, color temp, HSL |
| Adobe Photoshop | Precise layer-based work | Curves, Blend modes, dodge/burn, AI plugins |
| Vividon AI (Photoshop plugin) | AI relighting without reshoots | Multiple lighting environments, non-destructive |
| Luminar Neo | Beginners seeking quick results | AI sky replacement, relighting presets |
| Vibemyflat | Interior and property photos | Natural language AI lighting edits in under 30 seconds |
Most photographers already own Lightroom or Photoshop. If you are primarily working on interior or property images, tools built specifically for that use case handle the specific color casts and geometry of room photography far better than general-purpose editors.
Three lighting concepts you need to understand first
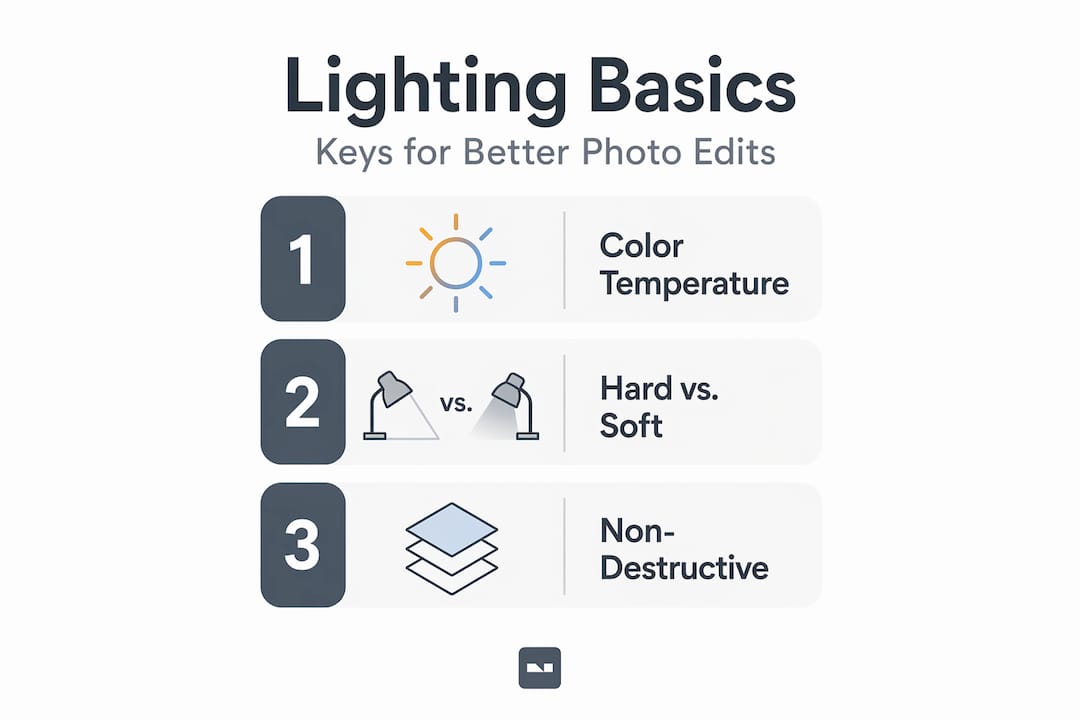
Color temperature describes the warmth or coolness of a light source, measured in Kelvin. Low Kelvin values around 2000 to 3000K produce warm amber tones, while values above 5000K produce cool blue-white tones. Mixing sources with different Kelvin ratings in the same shot is the most common source of color cast problems.
Hard vs. soft light comes down to source size relative to the subject. A bare flash creates hard, defined shadows. A large softbox creates smooth, gradual transitions. The direction of that light, whether it is front lit, side lit, or rim lit, shapes the three-dimensional quality of any subject.
Non-destructive editing means making changes that can be reversed or refined at any time. Working on adjustment layers in Photoshop or using Lightroom’s non-destructive workflow protects your original file.
Pro Tip: Before editing, calibrate your monitor. Color-corrected decisions on an uncalibrated screen can look completely wrong when the image is printed or viewed elsewhere.
Manual editing techniques for adjusting photo lighting
When you understand what each tool actually does, you stop guessing and start making deliberate choices. Here is a step-by-step workflow for adjusting photo lighting using standard editing tools.
- Set exposure first. Use the exposure slider to bring overall brightness to a neutral baseline. You are not trying to make it look finished yet. You are just making the image readable for the next adjustments.
- Work highlights and shadows. Pull highlights down to recover blown-out windows or bright areas. Push shadows up to open dark corners. This tonal balancing step alone resolves a surprising number of flat-looking images.
- Adjust whites and blacks. Set your white point and black point to establish contrast and depth. In Lightroom, hold Alt (Option on Mac) while dragging to see exactly where clipping begins.
- Correct color temperature. Drag the temperature slider warm or cool until white surfaces look genuinely neutral. If you have mixed light sources, use the HSL panel to target specific colors rather than shifting the entire image.
- Use the tone curve for precision. The point curve tool lets you brighten midtones without blowing highlights, or deepen shadows without crushing detail. An S-curve adds contrast; a flatter curve produces a matte look.
- Apply local adjustments last. Use graduated filters, radial filters, or the brush tool to selectively lighten or darken specific regions. This is where you can simulate directional light hitting a surface.
Common mistakes to avoid
Most editing errors at this stage fall into predictable patterns:
- Over-brightening shadows to recover detail, which amplifies noise and creates a muddy, flat image.
- Ignoring white balance because the overall brightness looks correct. Color casts affect perceived quality even when exposure is spot on.
- Skipping the tone curve because sliders feel simpler. Sliders adjust the entire tonal range uniformly; curves let you isolate specific tones.
- Working destructively. Always use adjustment layers or Lightroom’s non-destructive workflow so every decision is reversible.
Pro Tip: Zoom to 100% before finalizing any shadow recovery. Noise that looks acceptable at fit-to-screen view often becomes a real problem at full resolution.
Using AI tools to enhance lighting in images
AI relighting represents a genuine shift in what is possible for photographers without access to studio setups. Rather than simply brightening or darkening pixels, modern AI tools simulate geometry and light direction to produce effects that look like the light was actually there at capture.
The Vividon AI plugin for Photoshop runs non-destructively and offers multiple professional lighting environment presets. You can match an existing environment or create a custom one from scratch. A free tier is available if you want to test it before committing.
AI tools can generate cinematic rim lighting and deep shadows that once required elaborate multi-light setups. What previously took hours of studio time can now be applied in seconds through a prompt or a preset selection.
Getting the most from AI relighting
- Use the depth preview mode. Setting brightness to near 100% in foreground and 0% in the background reveals subject depth zones for more precise light placement. This reduces common artifacts like haloing around subjects or lighting that bleeds incorrectly into the background.
- Start with AI-generated lighting as a base layer. Apply the AI effect on a separate layer, then blend it manually using opacity and masking. This preserves your ability to dial back the effect if it goes too far.
- Match your color temperature. AI tools often produce beautiful light in the wrong Kelvin range for your scene. After applying an AI effect, revisit the color temperature to keep the result looking authentic.
- Combine AI with traditional interior lighting techniques for maximum control. AI handles the heavy geometry simulation. Your manual adjustments handle the fine tuning.
“AI is a powerful complement but cannot fully replace well-planned shoots. Lighting direction is best captured initially and then refined afterward via tools.” — Fixing bad lighting in photos with an API
Pro Tip: Always keep your AI-relighted layer separate from your base adjustments. If the final result looks overdone, you can reduce layer opacity to blend the effect naturally rather than starting over.
Practical tips to improve photo lighting during shooting
Editing time drops dramatically when you make better decisions at capture. These photo lighting tips apply whether you are shooting interiors, portraits, or product photography.
Light modifier fundamentals most photographers get wrong
Many photographers overspend on light modifiers without realizing that apparent source size and distance control light quality more than the modifier type itself. Moving a light source closer to your subject increases its apparent size and softens the light. Moving it farther away hardens it. This single insight makes a $30 umbrella outperform an expensive softbox used at the wrong distance.
Here is a practical reference for common modifier choices:
| Modifier | Light quality | Best use case |
|---|---|---|
| Bare strobe | Hard, directional | Drama, product edge lighting |
| Umbrella (shoot-through) | Soft, broad | Portraits, environmental shots |
| Softbox | Soft, controlled | Product flat lay, beauty lighting |
| Grid | Directional soft | Accent lighting, avoiding spill |
| Window (natural) | Soft and directional | Interiors, lifestyle photography |
Shooting habits that reduce post-processing time
- Set your white balance manually before each shoot, or shoot in RAW so you have full flexibility in post. Relying on auto white balance when mixing natural and artificial light is one of the most reliable ways to create mixed light color casts.
- Plan shoots around natural light windows. North-facing light is softer and more consistent than direct sunlight. Overcast skies act as a giant natural softbox.
- Use a gray card or color checker to set a neutral reference point, especially when lighting changes between frames. This makes batch editing far faster and improves lighting consistency across a shoot.
- Expose to the right. Slightly overexpose your raw files without clipping highlights. Shadow detail pulled up from a slightly bright raw file contains far less noise than the same detail recovered from an underexposed file.
Pro Tip: For interior work specifically, turn off all overhead fluorescent lights and use your own controlled sources. Mixing fixture types is the single biggest reason interior photos develop unworkable color casts.
Troubleshooting common photo lighting problems
Even experienced photographers end up with problem images. Knowing how to diagnose and fix them efficiently is what separates a good workflow from a slow one.
Backlighting and blown windows are the most common interior photography issue. Fix them in Lightroom by pulling highlights and whites down aggressively, then adjusting the blue and white channels in HSL to recover neutral sky or wall tones. If the window detail is completely clipped, there is no data to recover. AI relighting tools can generate a plausible interior light that draws the eye away from the issue, but they cannot invent missing pixel data.
Flat lighting makes subjects look dimensionless. The fix is adding contrast through the tone curve, applying a subtle darkening gradient from the top of the frame, or using a radial filter to add a gentle vignette. These techniques simulate the light falloff that gives images a sense of depth.
Noise from shadow recovery happens when you push underexposed areas too far. To minimize it, apply luminance noise reduction targeted specifically to the shadow regions using local adjustment brushes rather than applying global noise reduction that softens the whole image.
When AI relighting cannot fix the problem and manual editing is not working, the honest answer is a reshoot. AI is impressive, but it cannot simulate an entirely different direction of light without some geometric information in the source image to work with.
Pro Tip: Before deciding to reshoot, try a different AI relighting preset. What looks unfixable with a front-lit simulation often works well with a side-lit or window-light preset because it uses the existing shadows more effectively.
My honest take on AI versus traditional lighting edits
I have worked extensively with both manual editing workflows and AI relighting tools, and the thing most guides will not tell you is this: the people who get the best results from AI tools are the ones who already understand traditional lighting fundamentals. AI does not remove the need to understand what makes good light. It removes the friction of executing it.
What I have learned is that photographers who skip the fundamentals and go straight to AI often produce images that look technically processed but emotionally flat. The light looks like it was applied, not like it exists. Understanding color temperature, source direction, and falloff gives you the vocabulary to push back on what the AI gives you and get something that actually works for your image.
My personal workflow now runs AI as a first pass on problem images, followed by manual refinement. The AI handles the geometry. I handle the feel. Products with professionally optimized lighting see 34% more organic traffic and 23% lower return rates. Those numbers exist because viewers respond to light that feels intentional, not just corrected.
If you are starting out with AI lighting tools, spend two hours first studying how a single light source creates shadows, highlights, and gradients. That foundational understanding will make every AI preset you apply three times more useful because you will know what to look for and what to adjust.
— Hello
Take your lighting further with Vibemyflat
If you are working with interior or property photos specifically, Vibemyflat was built for exactly this workflow.

You describe the lighting change you want in plain language, and the AI applies it in under 30 seconds. Warm afternoon light through a window. Brighter overhead fill for a dark kitchen. Cooler tones to make a living room feel more spacious. No sliders, no layers, no learning curve. Vibemyflat’s AI understands interior design principles, so the results look like deliberate design choices rather than photo filters. Explore the AI photo editing platform and see what your spaces look like with the lighting they deserve.
FAQ
Why does lighting quality matter so much in photos?
Poor lighting reduces perceived value and viewer trust. Products with poor lighting see 37% higher return rates and up to 42% lower perceived value compared to professionally lit images.
What is the best way to fix color casts from mixed lighting?
Set your white balance manually at capture, or use the HSL panel in post to target and correct specific problem colors. Shooting in RAW gives you the most flexibility to correct mixed light color temperature without quality loss.
Can AI relighting replace a studio reshoot?
AI relighting can fix many common lighting problems quickly, but it cannot recover motion blur or invent light direction data that was never captured. Good source images are still the foundation.
What is the depth preview technique in AI relighting?
It is a method where you set foreground brightness near 100% and background near 0% to reveal subject depth zones, allowing precise light placement and reducing haloing artifacts.
How do I soften harsh light without buying new equipment?
Move your light source closer to the subject to increase its apparent size and soften shadows. Distance and angle control light quality more than the type of modifier you are using.