Photo-Based Renovation Planning: A Homeowner's Guide
Photo-Based Renovation Planning: A Homeowner's Guide

TL;DR:
- Photo-based renovation planning uses AI analysis of clear, multi-angle photos to generate realistic design renders before construction. It helps homeowners make informed decisions about refurbishing or demolishing surfaces while controlling costs and project scope. Proper photo quality and professional verification remain essential for accurate and feasible renovation plans.
Photo-based renovation planning is defined as the process of using photographs of your existing space, combined with AI analysis and design visualization tools, to build a complete renovation plan before any construction begins. This approach gives homeowners a clear picture of what their finished space will look like, which materials to choose, and where their budget should go. A guide to photo-based renovation planning covers everything from capturing the right photos to making smart refurbish-versus-demolish decisions. Tools like Vibemyflat process your room photos in under 30 seconds and return photorealistic renders that show proposed changes with professional accuracy. The result is fewer costly surprises and far more confidence going into any remodel.
What are the prerequisites and tools for photo-based renovation planning?
Effective visual renovation planning starts with the right inputs. AI tools can only work with what you give them, and poor photos produce poor results. Poorly lit or blurry photos reduce the accuracy of renovation visualizations significantly. That means your photo quality directly determines how useful your renovation plan will be.
What your photos need to include
Every room you plan to renovate needs multiple photos taken from different angles and heights. Shoot from each corner of the room, at eye level, and from a low angle to capture floor materials and baseboards. Bright, natural light is the standard. Avoid shooting into windows, which creates silhouettes and hides wall details. A minimum of four photos per room gives AI tools enough spatial data to segment surfaces accurately.

Tools that support the planning process
Three categories of tools work together in a complete photo-based workflow:
- Visualization tools: AI platforms like Vibemyflat that take your uploaded photos and generate photorealistic before-and-after renders based on your described style preferences.
- Budgeting calculators: Web-based tools that assign real-time cost estimates to material and design choices as you make them.
- Photo editing apps: Standard editing software used to correct exposure and color balance before uploading, without distorting spatial reality.
| Tool category | Primary function | When to use it |
|---|---|---|
| AI visualization platform | Generate photorealistic design renders | After capturing quality room photos |
| Budgeting calculator | Estimate costs per material and scope | Alongside visualization to weigh tradeoffs |
| Photo editing software | Correct lighting and exposure | Before uploading to AI tools |
| Structural assessment service | Confirm load-bearing feasibility | Before finalizing demolition decisions |
Pro Tip: Clear the room of clutter before shooting. Furniture, laundry, and personal items confuse AI segmentation and reduce the accuracy of surface identification.
How to execute photo-based renovation planning step by step
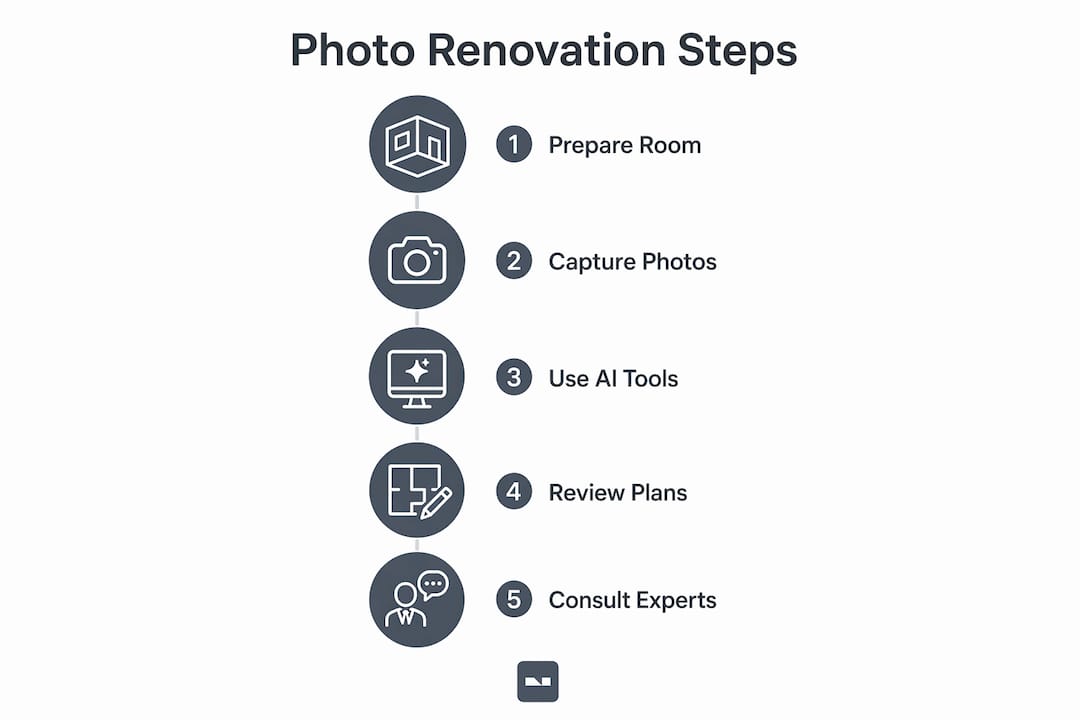
A step-by-step renovation guide removes the guesswork from what can feel like an overwhelming process. The sequence below reflects how professional renovation planners use photo inputs to move from raw images to a contractor-ready visual brief.
-
Upload clear photos and define your goals. Start by uploading your best room photos to your chosen AI platform. Then describe your renovation goals in plain language: the style you want, the surfaces you plan to change, and any elements you want to keep. Vibemyflat accepts natural language descriptions, so you can write “lighten the walls, replace the flooring with oak, and add recessed lighting” and receive a render that reflects those choices.
-
Segment the room and identify what stays. AI tools analyze your photos and identify distinct surfaces: walls, floors, ceilings, cabinetry, countertops, and fixtures. This segmentation tells you exactly what can be refurbished versus what needs full replacement. You review the AI’s recommendations and override any that do not match your priorities.
-
Generate photorealistic before-and-after renders. Homeowners can request 4–6 alternate views to refine their vision before construction begins. Each render maintains structural elements like window placement and ceiling height to keep the output realistic and structurally honest. This is the stage where you test paint colors, flooring types, and cabinet finishes side by side.
-
Integrate budgeting alongside your visuals. AI tools produce visual briefs, but combining AI designs with live budgeting tools prevents overspending. As you select materials in the visualization step, link those choices to a budgeting calculator that updates costs in real time. This keeps your aesthetic decisions grounded in what you can actually afford.
-
Iterate until the plan is final. Swap materials, request alternate color schemes, and adjust the scope until the renders match your vision and your budget. Each iteration costs nothing. Every change made at this stage is one fewer expensive revision during construction.
Pro Tip: Involve a structural engineer before you finalize any plan that includes wall removal or ceiling changes. A structural assessment typically costs $3,000–$8,000 but confirms load-bearing feasibility before you commit to demolition.
A common mistake at this stage is treating AI renders as construction blueprints. They are not. AI-generated layouts require professional confirmation of structural feasibility before any work begins. Use the renders to communicate your vision to contractors, not to replace their expertise.
What are key photo renovation tips to maximize accuracy?
The quality of your renovation plan depends almost entirely on the quality of your input photos. These photo renovation tips apply whether you are planning a single bathroom update or a full kitchen remodel.
- Use natural, even lighting. Shoot during the day with blinds open but not in direct sunlight. Harsh shadows hide surface textures and confuse AI color analysis.
- Shoot from multiple heights. Eye level captures walls and upper cabinets. A lower angle captures floors, baseboards, and toe kicks. Both matter for complete spatial mapping.
- Keep the room tidy. Clutter blocks surface identification. Remove rugs, dishes, and decorative items before shooting.
- Check resolution before uploading. Blurry or low-resolution images reduce AI segmentation accuracy. Most modern smartphones shoot at sufficient resolution, but always verify the image is sharp before uploading.
- Avoid heavy editing. Correcting exposure and white balance is fine. Applying filters or heavy saturation distorts color data and produces inaccurate renders.
- Capture adjacent spaces. If your kitchen opens to a dining area, photograph both. AI tools use spatial context to maintain design consistency across connected rooms.
Common pitfalls include shooting with overhead fluorescent lights only, which creates flat, color-distorting illumination, and using wide-angle lenses that exaggerate room size and mislead spatial calculations.
Pro Tip: Consistent photo style across all rooms helps AI tools compare before and after visuals accurately. Use the same camera, the same settings, and the same time of day for every shot.
For more expert strategies on photo-driven planning tips tailored to residential projects, Vibemyflat’s blog covers room-specific techniques in detail.
How can you make informed refurbish-versus-demolish decisions?
The refurbish-versus-demolish decision is where photo-based planning delivers its clearest financial value. Refurbishment is typically 2.5 times more cost-effective than full demolition and replacement. That gap is significant enough to change the entire scope of a renovation budget.
AI tools visually segment your space and flag areas recommended for retention, refurbishment, or demolition. Color coding makes the recommendations easy to read at a glance. You can override any recommendation based on personal priorities, but the AI gives you a data-informed starting point rather than a gut feeling.
| Factor | Refurbish | Demolish and replace |
|---|---|---|
| Cost | Significantly lower | Higher, often 2.5x more |
| Time | Days to weeks | Weeks to months |
| Disruption | Minimal | High |
| Aesthetic impact | Moderate to high | Maximum |
| Environmental impact | Lower waste | Higher waste |
Polished countertops and painted cabinets extend lifespan and aesthetic appeal while costing a fraction of full replacement. Granite counters that are scratched or dull can be professionally polished to near-new condition. Cabinet boxes in good structural condition can be repainted and fitted with new hardware for a fraction of the cost of new cabinetry.
The financial case for refurbishment is strong, but it is not universal. Cabinets with water damage, countertops with deep structural cracks, or flooring with subfloor rot require replacement regardless of cost. AI renders show you what the finished result could look like, but a contractor’s on-site inspection confirms whether the underlying structure supports that vision. Proper storage planning during renovation also reduces disruption when you are refurbishing in place rather than gutting a room entirely.
Pro Tip: Ask your AI tool to generate one render for a full-replacement scenario and one for a refurbishment scenario. Seeing both side by side makes the cost-versus-impact tradeoff concrete and easy to discuss with a contractor.
How to integrate budgeting and contractor planning with your visuals
AI visualization tools produce the design direction. Budgeting and contractor planning make that direction real. Using AI renovation planning before hiring contractors reduces costly design mistakes and incomplete scopes. The visual brief you generate becomes the clearest possible communication tool between you and the professionals you hire.
Best practices for aligning your visual plan with real-world constraints:
- Link material choices to cost estimates immediately. Every time you select a flooring type or countertop material in your visualization tool, check its cost in a budgeting calculator. Do not finalize a design without knowing its price.
- Share renders with contractors before requesting quotes. A contractor who can see exactly what you want gives a more accurate estimate than one working from a verbal description.
- Request itemized quotes that match your visual scope. Ask contractors to break down labor and materials by room and by element. This lets you compare their estimates against your AI-generated bill of quantities.
- Verify structural assumptions with an engineer. AI renders maintain window placement and ceiling height for realism, but they do not confirm whether a wall is load-bearing. An engineer’s sign-off is required before any structural change proceeds.
- Build a contingency into your budget. Even the most detailed visual plan encounters surprises once walls open. A 10–15% contingency buffer is standard practice in residential renovation.
For a deeper look at how AI assists renovation budgeting alongside design visualization, Vibemyflat’s resources walk through the full workflow with real examples.
Key Takeaways
Photo-based renovation planning works best when high-quality photos, AI visualization, real-time budgeting, and professional structural review operate together as a single workflow.
| Point | Details |
|---|---|
| Photo quality determines plan accuracy | Bright, clear, multi-angle photos give AI tools the data needed for realistic renders. |
| Refurbishment beats demolition on cost | Selective refurbishment is typically 2.5x more cost-effective than full replacement. |
| AI renders are communication tools | Use renders to brief contractors and align expectations, not as construction blueprints. |
| Budget integration prevents overspending | Link material choices to live cost estimates at every stage of the visualization process. |
| Structural review is non-negotiable | Confirm load-bearing feasibility with an engineer before finalizing any demolition plan. |
What I’ve learned from watching homeowners skip the visual step
Most renovation regrets share a common origin: the homeowner made a material or layout decision without ever seeing it in context. They chose a tile color from a small sample, approved a cabinet layout from a floor plan, and only saw the full picture when the work was done and the budget was spent.
Photo-based planning closes that gap. The renders are not perfect, and they are not meant to be. What they do is force a conversation between what you imagine and what is actually possible. That conversation, held before construction starts, is where money is saved and mistakes are avoided.
The limitation I see most often is overconfidence in the AI output. A photorealistic render of an open-plan kitchen looks convincing. But if the wall between the kitchen and the living room is load-bearing, that render is showing you something that requires significant structural work to achieve. The render does not know that. Your engineer does.
My honest advice: treat the AI render as the starting point for a professional conversation, not the end of one. Use it to get aligned on style and scope, then hand it to a contractor and a structural engineer before you commit to anything. The homeowners who get the most value from visual planning are the ones who use it to ask better questions, not to skip the questions entirely.
— Hello
Vibemyflat: see your renovation before it starts
Planning a renovation without seeing the result first is one of the most common and expensive mistakes homeowners make. Vibemyflat gives you a direct way to fix that.

Upload photos of your current space and describe the changes you want in plain language. Vibemyflat’s AI returns photorealistic renders in under 30 seconds, showing your room with new colors, materials, and layouts applied. The platform highlights which elements are worth refurbishing versus replacing, and it works across web, iOS, and Android so you can plan from anywhere. When you are ready to move from ideas to a real plan, start with Vibemyflat and see your renovation before a single wall comes down.
FAQ
What is photo-based renovation planning?
Photo-based renovation planning uses photographs of your existing space, combined with AI tools, to generate photorealistic design renders and budget estimates before construction begins. It replaces guesswork with visual evidence.
How many photos do I need to upload for accurate results?
A minimum of four photos per room, taken from different angles and heights, gives AI tools enough spatial data for accurate surface segmentation and realistic renders.
Can AI renovation tools replace a contractor or structural engineer?
No. AI-generated layouts are visual briefs, not construction blueprints. Always confirm structural feasibility with a licensed engineer before proceeding with any demolition or load-bearing changes.
Is it always better to refurbish than demolish?
Refurbishment is typically 2.5 times more cost-effective than full replacement, but it is not always possible. Surfaces with structural damage, water rot, or deep defects require replacement regardless of cost savings.
What makes a photo good enough for AI renovation tools?
Clear, well-lit, high-resolution images taken in natural light without clutter produce the most accurate AI renders. Blurry or poorly lit photos reduce segmentation accuracy and result in less reliable visualizations.