Visualize design ideas: save time and avoid mistakes
Visualize design ideas: save time and avoid mistakes
TL;DR:
- Proper planning and AI visualization tools prevent costly surprises in home renovation projects. They allow homeowners to test designs digitally, detect errors early, and make confident decisions before purchasing materials or hiring help. Using these tools boosts creativity, efficiency, and satisfaction while reducing financial risks and renovation time.
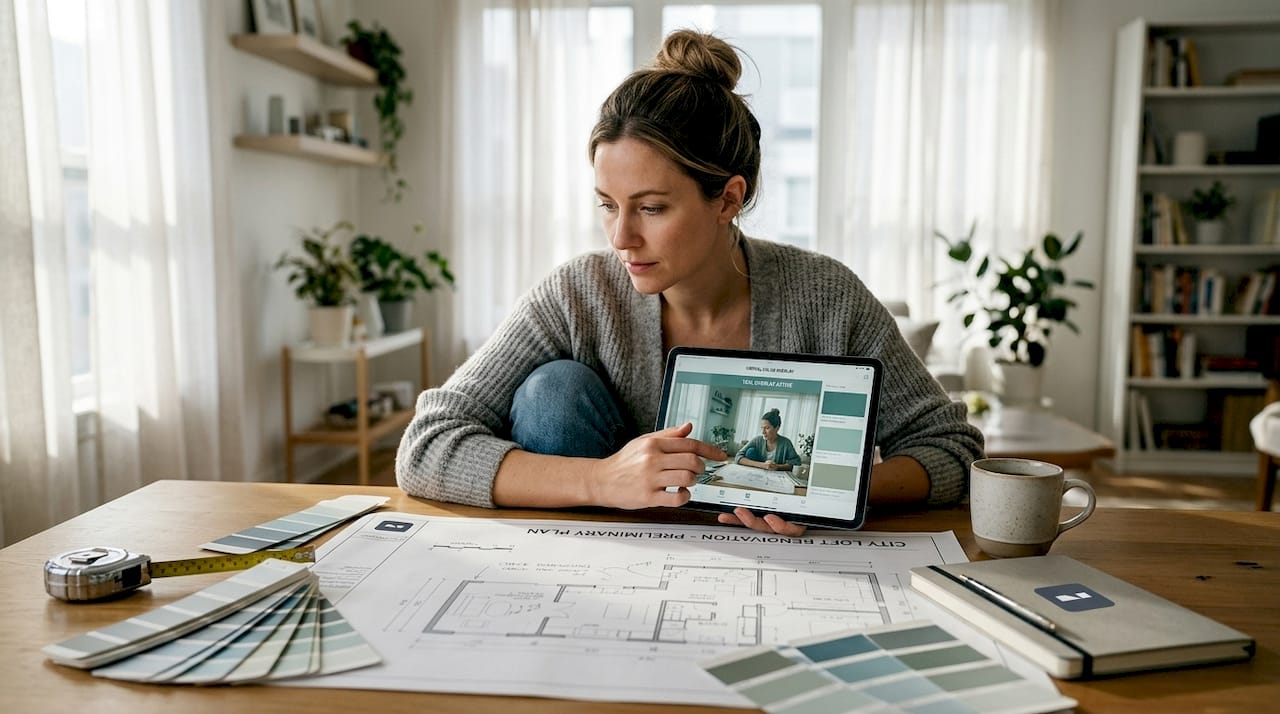
Taste and creativity are not enough to guarantee a great renovation. Most of the costly surprises in home improvement happen before a single nail is hammered, not because of poor execution, but because of poor planning. The gap between imagining a space and actually seeing it is where money disappears and regret is born. Fortunately, the same AI-powered visualization tools that professional design firms have used for years are now available to any homeowner or DIY renovator willing to take five minutes and a smartphone photo. This guide walks you through exactly how and why visualization changes everything.
Table of Contents
- The science behind visualizing design ideas
- Practical benefits: save time, reduce costly mistakes, and gain clarity
- How AI-powered tools professionalize your DIY projects
- From inspiration to plan: steps for effective design visualization
- What most people miss about visualizing design ideas
- Ready to bring your design ideas to life?
- Frequently asked questions
Key Takeaways
| Point | Details |
|---|---|
| Visualize before you act | Testing ideas with visuals first stops mistakes before they start. |
| AI boosts DIY quality | Modern tools let non-professionals achieve professional-looking results quickly. |
| Save time and money | Reducing rework and indecision helps keep renovation projects on track and budget. |
| Structured feedback matters | Metrics like realism and consistency give you confidence in your design choices. |
The science behind visualizing design ideas
The human brain is not great at accurately predicting how a finished room will look. We tend to fill in gaps with optimistic assumptions, which is exactly why so many “it looked great in my head” renovations end up expensive to fix. Visualization bridges that gap by moving an idea from abstract thought into something you can actually react to, test, and change before spending a dime.
Research backs this up clearly. Studies on design and innovation show that early and frequent experimentation in visual form improves both innovation effectiveness and efficiency, and that digital tools boost these effects significantly. In plain terms: the more you prototype visually, the better your final result tends to be.
“Moving an idea from your head onto a screen transforms it from a guess into a prototype. Prototypes can be tested, critiqued, and improved. Guesses cannot.”
This shift is enormous for homeowners. What used to require an interior designer with specialized software, rendering tools, and weeks of back-and-forth can now happen in under 30 seconds with an AI-powered app. You upload a photo, describe what you want in plain language, and the AI produces a realistic preview. That’s rapid prototyping at home, no professional training needed.
The benefits of this approach include:
- Early error detection: You catch layout problems, color clashes, and furniture sizing issues before they become real.
- Faster decision-making: Seeing options side by side removes the paralysis that comes with imagining multiple scenarios at once.
- Reduced financial risk: Changing a digital preview costs nothing. Changing installed tile costs everything.
- Confidence in choices: Seeing your actual space redesigned builds conviction, so you don’t second-guess mid-project.
Good interior renovation planning tips always start with a visual reference, and now you can generate that reference yourself without hiring anyone.
Practical benefits: save time, reduce costly mistakes, and gain clarity
Understanding the science shows why visualizing ideas matters, but what does it look like for real remodels and interior projects? The practical benefits show up across every stage of a renovation, from the first concept through to the final purchase order.
Consider these common DIY mistakes that visualization routinely prevents:
- Choosing the wrong paint color. Colors look dramatically different on a 2-inch swatch versus a full wall. AI tools let you see your exact room repainted in any color before you open a can.
- Undersizing or oversizing rugs. A rug that looked perfect online can swallow a small room or float awkwardly in a large one. Virtual placement shows you scale instantly.
- Poor lighting placement. Recessed lights, pendants, and floor lamps each create different moods. Seeing a simulated version tells you what actually works for your space.
- Bad traffic flow. Furniture that blocks doorways or creates awkward paths through a room is hard to notice on a floor plan but obvious in a rendered photo.
- Mismatched materials. Wood tones, metal finishes, and fabric textures that clash are painful to discover after purchase. Visual mockups expose conflicts early.
Research confirms that visualization-first workflows let people test ideas early, get feedback, and iterate, reducing the risk of failure and wasted effort. This is not just design theory. It directly translates to fewer returns, fewer regrets, and a smoother renovation from start to finish.
Here is a quick comparison of traditional planning versus visualization-first planning:
| Factor | Traditional planning | Visualization-first planning |
|---|---|---|
| Color decisions | Swatches and guessing | Realistic preview in your room |
| Layout testing | Measuring and sketching | Virtual furniture placement |
| Stakeholder buy-in | Hard to explain | Easy to show |
| Mistakes discovered | During or after build | Before any commitment |
| Time to first decision | Days or weeks | Minutes |
| Revision cost | Materials and labor | Zero |
Pro Tip: Before you commit to any paint, fabric, or flooring purchase, run at least three visual variations in an AI tool. You will almost always prefer a different option than your first instinct, and that discovery costs you nothing digitally but could save hundreds in real life.
Exploring mobile photo editing apps designed for interior design is a great way to find the right tool for your specific workflow, whether you are redesigning a studio apartment or a large family room.
Smart renovation budgeting basics also recommend locking down your design choices visually before you start requesting quotes, since changes mid-project are where budgets most commonly explode.
How AI-powered tools professionalize your DIY projects
Having seen the general benefits, let’s look at the specific ways AI-powered tools give everyday users the edge that used to belong only to professional designers.
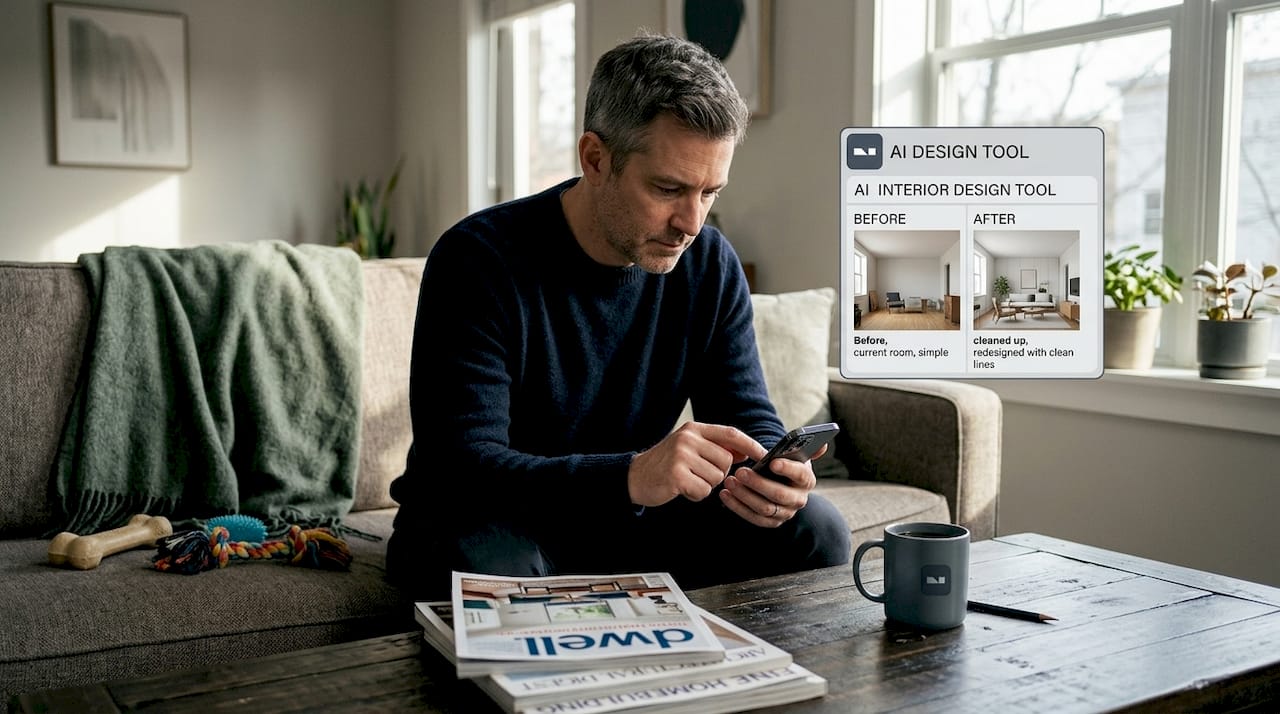
Modern AI platforms do more than apply a filter to your photo. They understand spatial relationships, lighting physics, material textures, and color theory. When you type “change the walls to warm sage green and add oak floating shelves,” the AI interprets that instruction and renders a result that respects shadow direction, wall dimensions, and the existing furniture in the frame. That level of intelligence is genuinely remarkable for a non-designer to have access to.
What separates strong AI tools from basic photo editors comes down to a few measurable qualities. Research on AI-generated layouts shows that structured, quantitative evaluation is possible, allowing users to assess realism, visual consistency, and human satisfaction compared to traditional planning methods. In practice, this means:
- Realism: The rendered result looks like a real photograph, not a cartoon or a rough sketch.
- Consistency: Lighting, perspective, and scale stay accurate across the entire image.
- User satisfaction ratings: Strong platforms track whether users find the results useful and believable.
- Iterative speed: You can generate and compare multiple versions in the time it would take to read a paint chip label.
Here is a breakdown of common AI visualization features and what they help you decide:
| Feature | What it does | Best used for |
|---|---|---|
| Wall color swap | Repaints walls in realistic light | Paint selection |
| Furniture placement | Adds or moves virtual furniture | Layout planning |
| Material simulation | Changes flooring, tile, countertop surfaces | Material selection |
| Lighting adjustment | Shifts warm vs. cool tone or brightness | Ambiance testing |
| Style transformation | Applies design themes (modern, rustic, etc.) | Overall direction |
These features are now available to anyone with a smartphone. Platforms like the ones featured in innovative AI design ideas show just how far home visualization has come. The gap between DIY and professional design output is closing fast.
Understanding AI photo transformation benefits can help you decide which features matter most for your project. And if you are curious about the mechanics, learning about automated editing for interiors will give you a solid foundation for choosing the right platform.
Pro Tip: When testing AI tools, always upload a high-quality, well-lit photo of your actual room. The better the input image, the more accurate and convincing the output. A blurry or dark photo limits what the AI can realistically simulate.
From inspiration to plan: steps for effective design visualization
Now that you know what the latest tools offer, let’s lay out exactly how you can use visual workflows to bring your own ideas to life without expert help. This process is repeatable, practical, and works whether you’re refreshing a single bedroom or planning a whole-apartment overhaul.
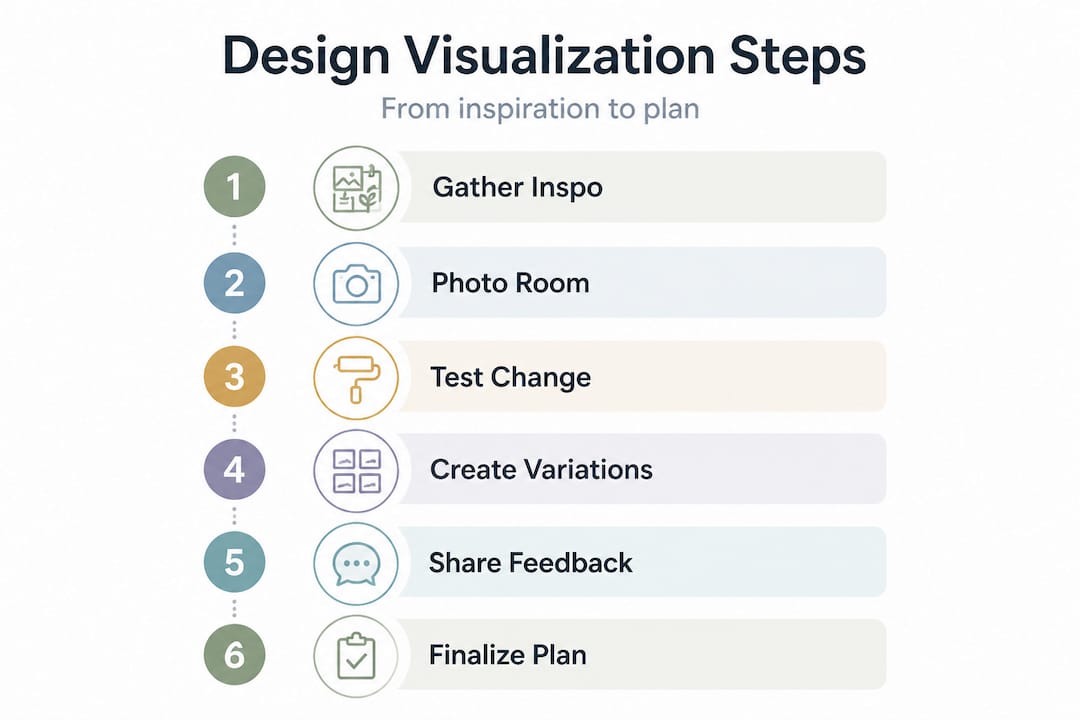
Step 1: Gather your inspiration. Start by collecting images, screenshots, or saved posts that show spaces you love. Pinterest boards, design magazines, and even real estate listings are all valid sources. The goal is to identify patterns in what you’re drawn to: warm versus cool tones, minimal versus layered, open versus cozy.
Step 2: Take a clear photo of your space. Stand in the corner or doorway of the room and capture as much of it as possible in a single, well-lit shot. Natural daylight works best. This photo becomes your starting canvas for every AI edit you run.
Step 3: Start with one big change. Rather than trying to redesign everything at once, test one major element first: wall color, flooring, or a large furniture piece. This keeps the feedback loop clean and helps you understand how each element affects the overall look.
Step 4: Run multiple variations. Generate at least three different options for each design decision. Try the bold choice, the safe choice, and the unexpected middle option. Save every version so you can compare them side by side later.
Step 5: Evaluate with fresh eyes. Step away from the screen for a few minutes and come back to look at your saved versions. First impressions after a short break tend to be more reliable than reactions formed in the moment of editing.
Step 6: Share for feedback before you build. Show your top two or three options to someone else, whether a partner, a friend, or an online design community. A second perspective often catches things you have grown blind to.
Step 7: Lock in your plan and then shop. Only after you have settled on a final visual direction should you start purchasing materials, booking contractors, or heading to the hardware store. This order of operations alone saves most people significant time and money.
Research shows that using digital visualization and iterative testing improves satisfaction and outcomes in design projects. Following a structured visual workflow is the clearest path to getting there.
The DIY interior editing guide provides even more hands-on direction if you want to go deeper on any of these steps.
Pro Tip: Save your room photo and all your AI-generated versions in a dedicated folder labeled by room and date. When you’re ready to brief a contractor or share your vision with a paint store associate, having those images ready makes every conversation faster and cleaner.
What most people miss about visualizing design ideas
After walking through all the evidence and the step-by-step process, it is worth asking an honest question: why do so many homeowners still skip the visualization stage entirely?
The answer is usually one of two things. Either they believe they can “see it in their head” well enough, or they think visualization requires expensive software and design training. Both assumptions are wrong, and both are costly.
The confidence trap is the more dangerous one. Most of us genuinely believe we can predict how a finished room will feel. We picture the navy blue walls, the warm lighting, the new sofa, and it all looks great in our imagination. But imagination edits out the awkward angles, the odd window placement, and the way natural light actually hits your east-facing room at noon. The surprise when reality arrives is almost always negative unless you have pre-visualized with real images.
The regret data from homeowners bears this out. The most commonly cited renovation mistakes are not about poor craftsmanship. They are about preventable decisions: colors that felt right in theory, layouts that seemed logical on paper, or furniture that looked fine in a showroom but wrong in context. These are exactly the categories that visualization catches.
Here is the insight that changes how you think about creativity in home design: visualization does not constrain your imagination. It supercharges it. When you can test a wild idea in 30 seconds with zero risk, you are more likely to try bold choices, not less. Fear of wasted money is what kills creativity in renovation. Remove that fear and you suddenly have permission to experiment.
Exploring types of interior redesign ideas can open your thinking to options you might not have considered if you were only working from memory and imagination.
The real shift is treating your home as a test lab rather than a final exam. In a test lab, you run experiments, observe results, and adjust. In a final exam, every move counts and there are no do-overs. AI-powered visualization is the tool that turns your renovation into a test lab. Use it like one.
Ready to bring your design ideas to life?
If the process above sounds powerful, that’s because it is, and you don’t need to piece together multiple tools to make it work. VibeMyFlat was built specifically for homeowners and DIY renovators who want professional-grade visualization without the professional-grade learning curve.

With VibeMyFlat’s AI photo editor, you simply upload a photo of your room, describe the change you want in plain language, and get a realistic, high-quality preview in under 30 seconds. No design background needed. No complicated software. Just your idea, your space, and an AI that understands both. Thousands of homeowners have used it to make faster, smarter decisions and to walk into renovations with total confidence. Your risk-free design journey starts with one photo.
Frequently asked questions
What are the key benefits of visualizing my design ideas before starting a renovation?
Visualizing lets you test ideas, avoid costly mistakes, and save time by iterating digitally before making any physical changes. Research shows that rapid prototyping reduces risk of failure and wasted effort in any design process.
How do AI-powered visualization tools improve my design planning?
AI tools evaluate design options for realism, layout accuracy, and user satisfaction, giving you professional-level feedback without hiring a designer. Studies confirm that AI enables structured evaluation for layouts that rivals traditional planning methods.
Can visualization tools really prevent common DIY mistakes?
Yes, viewing and revising multiple design versions virtually helps you spot layout issues, color mismatches, and scale problems before they become expensive fixes. Early visualization enables iteration and significantly reduces the chance of errors making it to the build stage.
Are these tools useful for small apartments and large homes alike?
Absolutely. AI visualization works for any room size, letting you compare and optimize layouts, colors, and furniture arrangements no matter how much or how little space you have to work with.
How much do AI-powered visualization apps cost?
Prices range from free trial versions to affordable monthly subscriptions, so you can find an option that fits your budget and the scale of your project.