Visualize interior design: AI makeover guide 2026
Visualize interior design: AI makeover guide 2026
TL;DR:
- AI visualization tools enable quick, photorealistic interior design previews before making physical changes.
- Proper photo setup and specific prompts are essential for accurate and satisfying AI-generated results.
- These tools significantly reduce time and cost by helping homeowners visualize and plan renovations efficiently.
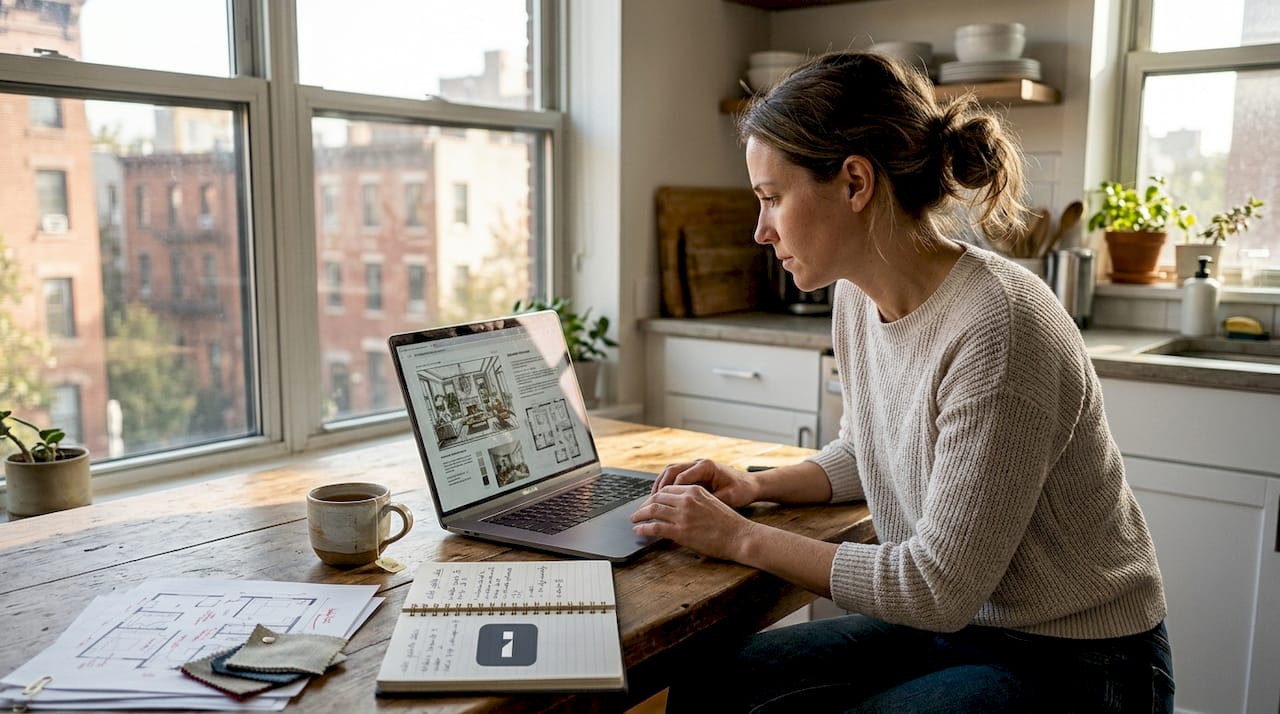
Picture this: you’ve got a clear vision of your dream living room, but every time you try to explain it, or worse, commit to paint and furniture, it never quite matches what was in your head. You’re not alone. Most homeowners hit this wall, and it costs time, money, and a lot of frustration. AI-powered visualization tools have changed the game entirely, letting you see design changes before spending a single dollar. This guide walks you through exactly what you need, how to use these tools step by step, and how to turn a digital concept into a real renovation plan you can actually execute.
Table of Contents
- What you need: Tools, photos, and setup
- Step-by-step: Visualizing your interior design with AI
- Common mistakes and how to avoid them
- Turning your AI visualization into real results
- Our take: What most guides miss about visual design
- Ready to bring your vision to life?
- Frequently asked questions
Key Takeaways
| Point | Details |
|---|---|
| Start with good photos | A clear, well-lit room photo is crucial for accurate AI design visualization. |
| AI saves time | AI platforms can generate multiple design options in under a minute, drastically speeding up the process. |
| Avoid common mistakes | Watch out for clutter, poor angles, and vague design prompts to get actionable results. |
| Export actionable plans | Leverage categorized shopping lists and prioritized steps to make your virtual designs real. |
| Blend tech and intuition | Combine AI suggestions with your personal taste for satisfying and practical home upgrades. |
What you need: Tools, photos, and setup
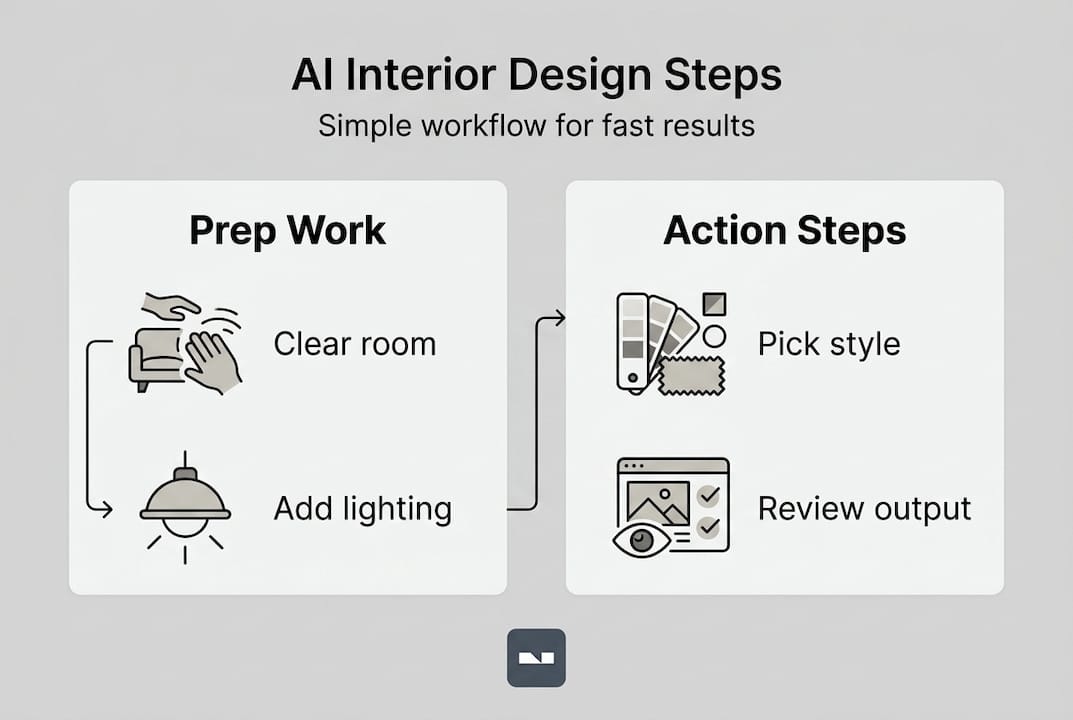
Before you open any app, make sure you have the right foundation. Skipping the prep stage is one of the most common reasons people get underwhelming results from AI design tools. Here’s what you’ll need to get started:
- A smartphone or camera capable of shooting at least 12 megapixels
- An AI visualization platform (more on the top options below)
- A decluttered, tidy room so the AI reads the space accurately
- Good natural or artificial lighting with no harsh shadows
- A stable surface or tripod to avoid blurry shots
Choosing the right platform matters more than most guides admit. Here’s a quick side-by-side of three popular AI visualization tools:
| Platform | Key feature | Speed | Ease of use |
|---|---|---|---|
| Habitas | Hyper-realistic rendering | ~45 seconds | Intermediate |
| VisualizeAI | Style library + custom prompts | ~30 seconds | Beginner friendly |
| RoomsGPT | Fast variant generation | ~20 seconds | Very easy |
Each platform has its strengths. RoomsGPT is great for quick experiments, while VisualizeAI gives you more control over style direction. If you want to go deeper on platform features, browsing guides on DIY interior photo editing can help you understand what to look for before committing to one tool.
Once you’ve picked your platform, setting up the room correctly is half the battle. Move extra furniture out of the frame. Turn on every light in the room, and if possible, shoot during the day with curtains open. Follow home photography guidelines to frame the shot from a straight-on angle at roughly mid-wall height. As AI design experts confirm, successful results start with straight-angle, well-lit photos. A blurry or angled shot is the fastest way to get a design that looks nothing like your actual room.
For more on how lighting impacts the final output, the lighting tips for photos resource at VibeMyFlat covers exactly what angles and light temperatures work best for interior shots.
Pro Tip: Shoot your room during the late morning when natural light is brightest and most even. Turn off overhead fluorescents to avoid mixed-color shadows that confuse AI processing.
Step-by-step: Visualizing your interior design with AI
With tools and prep out of the way, here’s exactly how to visualize your space using AI from start to finish.
- Choose your room and set a goal. Pick one room to start. Decide what you want to change: color, furniture layout, flooring, or a full style overhaul. Narrowing your focus helps the AI generate more relevant results.
- Capture your photo. Stand at a corner or doorway and shoot at mid-height. Get as much of the room in frame as possible without distorting the perspective. Shoot two or three versions so you have options.
- Upload to your chosen AI tool. Most platforms have a drag-and-drop upload or a simple file browser. Some mobile apps let you shoot directly within the app for faster workflow.
- Select a style or write a custom prompt. This is where the fun begins. Choose a preset like Scandinavian, Industrial, or Coastal, or type in your own description: “warm tones, minimalist furniture, wood accents.”
- Review the generated design variants. Most tools give you multiple versions to compare. Look for structural accuracy first, then aesthetics.
Here’s a quick look at what to expect from the generation process:
| Platform | Avg. generation time | Variants per session | Before/after slider |
|---|---|---|---|
| RoomsGPT | 20 seconds | 4 | No |
| VisualizeAI | 30 seconds | 3 | Yes |
| Habitas | 45 seconds | 3 | Yes |
The speed advantage is real. According to AI design research, AI generates 3+ design variants in 30 to 60 seconds, offering significant time savings compared to hiring a designer for mood boards. For context on why this matters beyond convenience, the AI photo transformation benefits breakdown explains how faster iteration leads to better final decisions.
Pro Tip: Use the before/after slider feature whenever it’s available. Seeing both views side by side removes the guesswork and makes it much easier to commit to a direction. You can also explore innovative AI design ideas to spark creativity before you even write your first prompt.
Common mistakes and how to avoid them
Once you’ve run through the steps, avoid these mistakes to make your design process smoother.
Here are the most frequent errors that trip up homeowners and DIYers:
- Shooting at a diagonal angle instead of straight-on, which distorts room proportions in the output
- Using low or mixed lighting, causing the AI to misread wall colors and furniture tones
- Leaving clutter in the frame, which confuses the AI and produces messy results
- Writing vague style prompts like “nice” or “modern” without enough descriptive detail
- Accepting the first output without iterating on the prompt or retaking the photo
As noted in photo guidelines, taking a few extra minutes to set up your shot correctly pays off significantly in output quality. And research confirms that poor photo quality leads to misleading designs or unusable results. This isn’t a minor inconvenience. A bad photo can generate a design that looks nothing like your room, sending you down the wrong path entirely.
Warning: Always check your AI output carefully. Incorrect angles can lead to misleading redesigns that look good on screen but are spatially impossible in your actual room.
The fastest fix for most problems is simple: retake the photo. If the design still looks off after a better photo, sharpen your prompt. Instead of “modern living room,” try “modern living room with white walls, gray linen sofa, and warm oak flooring.” Specificity is your best friend here.
For more inspiration on what styles are possible before you craft your prompt, browsing types of redesign ideas gives you a concrete vocabulary to work with. And if you want to understand how the underlying technology processes your edits, automated photo editing tips explains what’s happening behind the scenes.
Turning your AI visualization into real results
Even with a great visualization, turning ideas into reality is where real progress happens.
A beautiful AI render is useless unless you can execute it. The best tools don’t just show you a pretty picture. They help you build a roadmap. Once you’ve landed on a design you love, here’s how to move it from screen to reality:
- Export your design as a high-resolution image or PDF summary
- Build a shopping list organized by category:
- Furniture: sofa, chairs, tables, storage
- Paint and wall treatments: color codes, finishes, wallpaper
- Lighting: fixtures, bulbs, placement notes
- Decor and accessories: rugs, cushions, art, plants
- Prioritize by difficulty and cost so you tackle low-effort, high-impact changes first
- Set a realistic budget before purchasing anything, using the design as a reference point
This is where AI tools earn their keep beyond aesthetics. AI-powered tools provide categorized shopping lists and execution plans that make the transition from concept to action much faster. The time savings are significant: what once took weeks of designer consultations, mood boards, and revisions now takes minutes.
95% time savings is not marketing fluff. That’s the real-world difference between the traditional design process and an AI-assisted one, measured in weeks reduced to a single afternoon session.
Once you have your list, group tasks by room zone: walls first, then large furniture, then lighting, then accessories. This keeps the project manageable and lets you see progress at each stage. For a broader look at how this process plays out across a full home project, the guide on transforming your space with AI covers what to expect from start to finish.
Our take: What most guides miss about visual design
Most AI interior design guides focus entirely on features and speed. They show you the fastest path from photo to render and call it done. But here’s what they consistently skip: the gap between what looks great on screen and what actually works in your life.
AI tools are genuinely impressive. They produce polished, photorealistic results faster than any human designer. But they don’t know that you have three kids, a dog, and a strict no-white-furniture policy. They don’t account for the fact that your apartment gets afternoon sun only, or that you’ve already committed to keeping your grandmother’s armchair.
The best design outcomes we’ve seen come from people who use AI as a starting point, not a final answer. Run five or six variants. Note what consistently shows up across different styles, because those recurring elements are clues about what you actually want. Then adjust for reality.
Pro Tip: Screenshot the AI outputs you love, then list one thing per image that wouldn’t work in your real life. That editing process is where your actual design emerges.
For those working with mobile tools on the go, mobile photo editing success offers practical advice on getting the most out of quick smartphone sessions without losing quality.
Ready to bring your vision to life?
You’ve got the steps, the strategy, and the insight to make AI-powered visualization actually work for your home. The next move is yours.

VibeMyFlat interior design tools put everything you need in one place: fast AI rendering, natural language prompts, and professional-quality results in under 30 seconds. Whether you’re planning a single room refresh or a full apartment overhaul, VibeMyFlat handles the heavy lifting so you can focus on what matters: making your space feel like home. Upload your first photo today and see your design ideas take shape before you spend a cent.
Frequently asked questions
What types of rooms work best for AI design visualization?
Rooms that are uncluttered and well-lit produce the most accurate AI results. Straight-angle, well-lit photos give the AI the clearest read on your room’s actual dimensions and colors.
How long does the AI visualization process take?
Most platforms generate 3+ variants in about 30 to 60 seconds per room photo, making the whole process faster than a typical design consultation.
Can I customize the style or prompt for my room design?
Yes, most AI tools let you select preset styles or write a custom description. Custom prompts like “Scandinavian with warm wood tones” typically produce more tailored results than generic style tags alone.
What should I do if my AI design output looks odd?
Start by checking your photo’s lighting and angle, then retake if needed. Poor photo quality is the most common cause of inaccurate or unusable AI design outputs.
How can I turn AI-generated plans into real renovation projects?
Export your design and organize a shopping list by category, then prioritize tasks by cost and effort. Categorized shopping lists from AI tools make it straightforward to move from visualization to real-world execution.